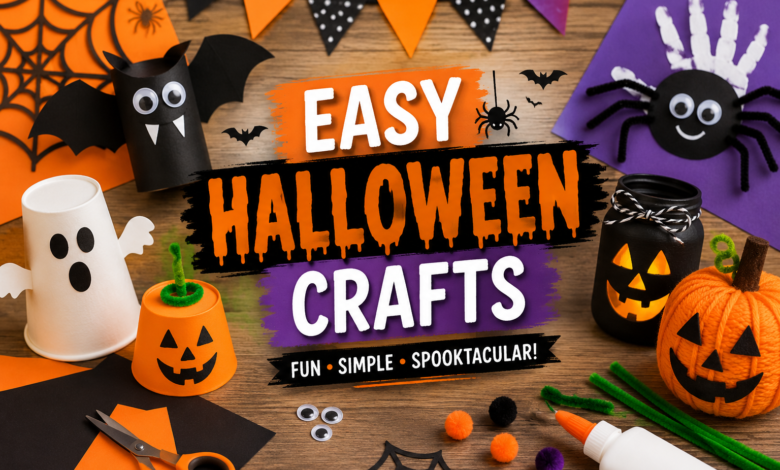
Easy Halloween Crafts, Halloween is one of those times of year when a little creativity can completely transform a home. You do not need expensive decorations or complicated supplies to create a spooky atmosphere. With some paper, paint, cardboard, fabric, and a bit of imagination, you can make decorations that look surprisingly impressive. That is exactly why easy Halloween crafts have become so popular with families, teachers, DIY fans, and anyone who enjoys decorating on a budget.
The best part about making Halloween decorations yourself is that there is no single right way to do it. A simple paper ghost can look charming, while an old jar can become a creepy lantern with just a few basic materials. Homemade crafts also give children an opportunity to participate in Halloween preparations instead of simply watching adults decorate. Whether you are planning a Halloween party, decorating your front porch, or looking for a rainy-day activity, there are plenty of simple projects worth trying.
In this guide, we will explore creative easy Halloween crafts that are affordable, beginner-friendly, and fun to personalize. Some ideas are perfect for kids, while others can add a more sophisticated spooky touch to your living room, bedroom, classroom, or outdoor space. The goal is simple: make Halloween more creative without making it stressful.
Why Easy Halloween Crafts Are Worth Trying
One of the biggest advantages of DIY Halloween projects is that they can save money. Store-bought decorations can become surprisingly expensive when you are trying to decorate several rooms or prepare for a party. Crafting at home lets you reuse things you already have, including cardboard boxes, glass jars, paper bags, old newspapers, and leftover wrapping paper. A small amount of paint or construction paper can turn ordinary household items into something completely different.
Another reason people enjoy easy Halloween crafts is the personal touch they bring to a celebration. A handmade decoration does not have to look professionally manufactured to be attractive. In fact, tiny imperfections often make DIY decorations feel more charming. A child can draw a funny face on a pumpkin, or a family can create a collection of paper ghosts with different expressions. These details can become memorable parts of your Halloween traditions.
Crafting can also be a relaxing activity. Instead of spending hours searching for the perfect decoration, you can sit down with a few supplies and make something yourself. It is especially useful for families who want activities that do not involve screens. Put on some Halloween music, gather the materials, and let everyone create their own spooky designs.
Paper Ghost Decorations
Paper ghosts are among the simplest Halloween decorations you can make. All you need is white paper or lightweight cardstock, scissors, a pencil, and a black marker. Draw a simple ghost shape, cut it out, and add eyes and a mouth. If you want several ghosts, create different expressions so that each one has its own personality.
For a hanging decoration, punch a small hole near the top of each ghost and attach a piece of string. You can hang them from a doorway, window, bookshelf, or ceiling. Another option is to connect several ghosts together to create a Halloween garland. Children can easily participate in decorating the faces, making this project particularly suitable for classrooms and family craft sessions.
You can also make the ghosts more interesting by using tissue paper. Place a small piece of crumpled paper underneath the center of a tissue sheet, gather the tissue around it, and tie the lower section with string. Add a face with a marker, and you have a soft, three-dimensional ghost. A group of these little ghosts can create a playful Halloween display without requiring complicated crafting skills.
Spooky Mason Jar Lanterns
Old glass jars may be easily converted into cute Halloween lanterns with minimal effort. First, clean the jar and peel off any label that you find on it. Then, use acrylic paints to paint the exterior orange, purple, white or any other suitable color. After drying, decorate the jar by creating designs like bats, ghosts, pumpkin shapes, spiders, or ghost faces.
A simple way to create a glow-in-the-dark effect is to put a battery-operated LED tea light inside the glass jar. Battery-operated lights are preferred for decorative purposes over the traditional candle since the latter includes the element of open flame. The light of the LED light will create a cozy atmosphere with the help of the design on the glass surface.
Alternatively, you can wrap the jar in strips of translucent tissue paper and draw black paper silhouettes for the eyes, mouths, or other facial features and place an LED light inside. Several jars with different faces can be arranged on the same table.
DIY Halloween Bats
Bats have long been considered an element of the Halloween theme and, moreover, they can easily be made out of black construction paper and cardboards. One needs only to draw a bat silhouette on paper, cut it out and use as a pattern to make some other bats. It is possible to make bats of different sizes to create more of a natural look.
Then one should attach the little bits of adhesive tape to the reverse side of the bats and put them on the wall. The bats may be placed as if they fly toward the door or the window or any Halloween decoration. A swarm of bats rising up may look really scary.
As an alternative to paper bats one can use thin black cardboard and add a little detail to them with white or silver marker. This is especially good in case one needs to make Halloween decorations which occupy minimum space for storing after the holidays are finished.
Toilet Paper Roll Halloween Characters
Instead of disposing of toilet paper rolls, you can reuse them by making little Halloween figures. Using paint, colorful papers, glue and pens, you will be able to convert cardboard tubes into witches, vampires, pumpkins, mummies and monsters. The main thing that remains to do is to decorate this already existing object.
To make a mummy, you need to cover a tube with narrow strips of white paper or gauze, leaving the eyes uncovered. A pumpkin can be painted orange and then adorned with green paper on its head. As for the vampire, its cape should be made of black paper, and the rest of the face will consist of a simple drawing. Children can come up with a whole gallery of characters which can be used as table decorations.
It is also a great lesson for children on how to use recycled material. Instead of buying everything new, they learn to give the second life to usual items.
Halloween Paper Plate Crafts
Paper plates can also be another cheap material that turns out into very creative Halloween decorations. Paint a plate orange and add a pumpkin face, or cover it with white paper to make it into a ghost. It is possible to make a spider and a spooky monster by means of black paint and strips of paper.
A good example is how to make a spider using a paper plate. It needs to paint a plate black, attach several strips of black paper as legs of a spider, and add big eyes. Eyes can be made funny, scary, and really big depending on your style. This activity suits for the youngest children since a shape doesn’t require any cutting.
It is possible to make a mask with a help of paper plate as well. Make eye holes, decorate the front of a plate with ears, fangs, whiskers, and other elements. Don’t forget to attach string or a stick. Of course, do not allow young children to use scissors unsupervised.
Homemade Halloween Garland
The Halloween garland will create unity in the entire room without needing many materials. Make shapes like pumpkins, ghosts, bats, stars or witches’ hats from colorful paper. Then punch holes on top of them and hang them up on strings or ribbons.
For a more appealing garland, change both the colors and the shapes rather than sticking to one type of shapes and color throughout. Try making an orange pumpkin between black bats then white ghosts. Small paper circles and stars can also be used to fill the gaps left.
Garlands suit very well at fireplaces, windows, bookshelves, party tables and doorways. Garlands can also be made to fit into various themes of decorations. For those who fancy a cute Halloween theme, go for smiley ghosts and nice pumpkins. For those who want something dark, use black silhouettes.
Painted Halloween Rocks
If you have smooth rocks available, painting them can become a fun outdoor or indoor Halloween activity. Wash and dry the rocks first, then paint them with simple designs. Pumpkins, ghosts, black cats, spiders, candy corn, and tiny monsters are all good choices.
You do not need advanced painting skills. A simple pumpkin can be created with an orange base, a few black lines, and a green stem. A ghost can be painted white with two black eyes. For a more polished finish, allow each layer of paint to dry before adding details.
Once finished, painted rocks can be placed around potted plants, on a porch, beside a doorway, or along a garden path. If you plan to keep them outdoors, using suitable outdoor craft paint and a protective sealant can help the designs last longer. This is another excellent example of easy Halloween crafts that can become a family activity.
Crafting a Friendly Halloween Wreath
However, there is a cheap way to decorate your front door for Halloween. All you need is to start with a cardboard ring, foam, or wreath form. Then cover it with black, orange, purple, or white ribbons, depending on how you would like the design to look.
The next step involves putting up some lightweight decorations like paper bats, miniature pumpkins, artificial leaves, ghosts out of felt, and any other cardboard cutouts. Your design may be either cute and colorful or dark. The only thing you should be careful about is not to use many heavy decorations that will complicate hanging the wreath.
Another cheap option is to make a paper wreath in orange and black color combination. It consists of cutting several leaves or Halloween-related shapes from construction paper and then arranging them on the base of your choice. Add a small greeting like “Happy Halloween” in the center of the wreath.
Tips for Making Halloween Crafts More Fun
The best way to make Halloween crafts fun is to not be worried about doing everything perfectly. Craft projects are meant to be creative and people’s results will differ. Instead of trying to create every single decoration to look alike, let people play with colors, shapes, and faces.
Organizing all your materials in advance is also beneficial. Place paper, scissors, glue, markers, paints, brushes, string, and recyclables in one place so that the work would go more smoothly and you won’t be distracted by constantly looking for your materials. Cover the table with old newspapers or a reusable cover, if you are painting or gluing something.
Finally, think of where you are going to put your decoration beforehand. Hanging ghosts require different treatment from table decorations, while outdoor wreaths require different materials than indoor paper decorations.
Final Thoughts on Easy Halloween Crafts
There is no need for Halloween decorations to cost a fortune and take hours to arrange. The best decorations may be created with the help of material that already exists around the house. It will be fun to create paper ghosts, painted rocks, jars that will serve as lanterns, bats out of cardboard, toilet rolls in different costumes, and hand-made garlands.
The true beauty of easy Halloween crafts is in the process itself. Creating holiday decorations helps families and friends spend time together in a creative way; kids will enjoy seeing their ideas being brought to life during a holiday party. Even the easiest handmade pumpkin seems special because of its personal touch.
Therefore, forget about making sure that you have the greatest number of Halloween decorations, and do not stress yourself out by spending much money on creating your home holiday decor. Just collect some basic material, pick a few projects, and use your imagination.
You May Also Read: Texas SNAP Benefits Update